Run a Pleroma server on Fly.io’s free tier. Pleroma can use Mastodon apps and federate with Mastodon servers.
I wanted to run my own ActivityPub server. I like self hosting. I don’t like spending money. For a while I had tried setting up Mastodon but I didn’t get super far. I had a pretty rough cold for the last two days and suddenly I had a free schedule to figure this out. I ended up pounding my head on the wall a bit, but here we go!
Instructions
This assumes you have the flyctl (aka “fly”) command line tool and you’ve already run fly auth signup or fly auth login. Also, this uses the command line (Terminal on macOS).
1. Initiate the Fly.io app 🐣
Create an application. We’ll be using Pleroma because it’s light-weight enough to run in the free tier constraints. When prompted with the command below, you’ll need to launch:
- 🐘 with a Postgres instance
- 🧑💻 “Development - Single node” configuration
- 👎 without Redis
- 🏃 Yes, deploy! It’ll take ~2 minutes.
fly launch --image salvatoret/fly-pleroma:v2.4.4This will generate a fly.toml. When you run the fly command make sure the fly.toml is in the same directory.
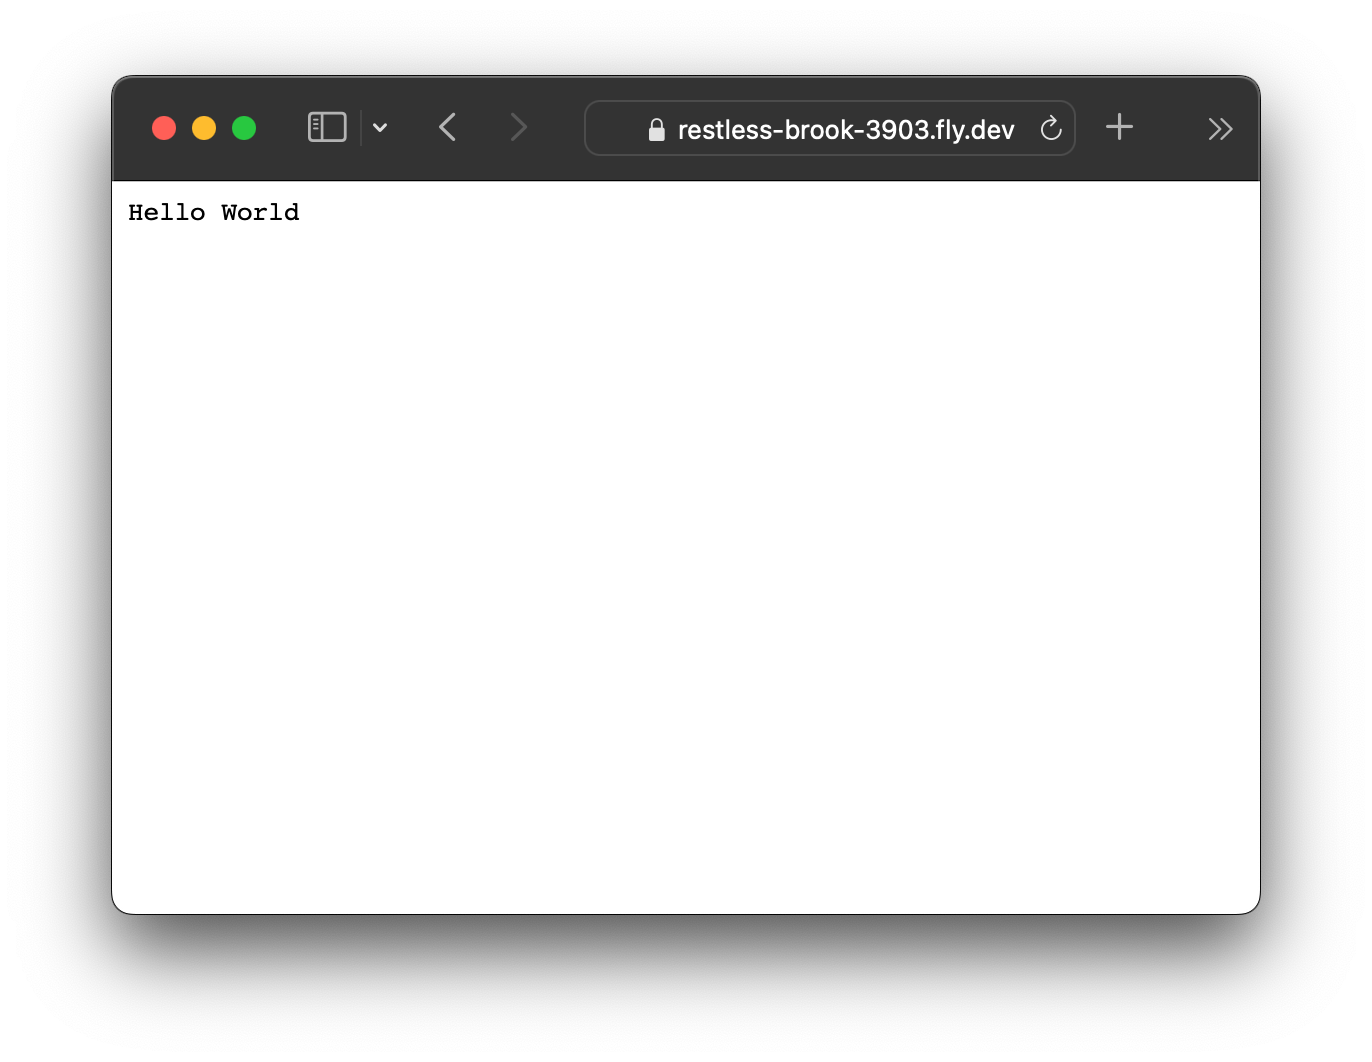
Save the Postgres configuration information! Once you’ve done that, treat yourself with a “hello world”.
fly openIf you don’t want to purchase a domain, the one you see in the browser will work (e.g. your-app-1234.fly.dev).
2. (Optional) Configure DNS and Certs 🏷
If you’re happy with your-app-1234.fly.dev, go to the “Create storage” step.
Create your (one free) IPv4 and IPv6 addresses.
fly ips allocate-v4
fly ips allocate-v6
Add the IPv4 and IPv6 address to the A and AAAA records respectively to your DNS. Do not proxy.
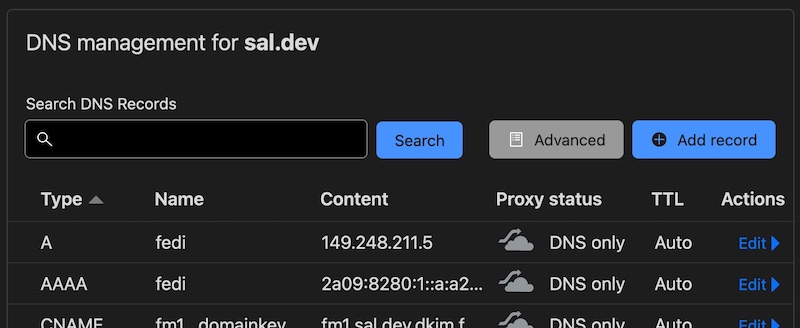
fly certs create <your-domain>Whenever you want to see the status run fly certs check <your-domain>. This should go quickly, but you can continue with these instructions on if you’re in a hurry.
3. Create storage 📦
The data in the volume stays between deployments. It needs to be in the same region as step 1.
fly volumes create pleroma_storage --size 1In your fly.toml file, add the following environment variable and volume information.
[env]
  PLEROMA_CONFIG_PATH = "/mount/config/config.exs"

[mounts]
  source = "pleroma_storage"
  destination = "/mount"
Publish the changes.
fly deploy4. Generate your configs 🧙
Connect to your server as the pleroma user.
fly ssh console --command "su pleroma --shell /bin/bash"You’ll need to make some choices about your server. Have the following Postgres configuration info ready.
- hostname of your database (e.g.
your-app-1234-db.internal) - password used to connect to your database (e.g. ao09u87ao0e9u)
# from the `fly shell console`
/opt/pleroma/bin/pleroma_ctl instance gen \
  --output /mount/config/config.exs \
  --output-psql /tmp/setup_db.psql \
  --dbname pleroma \
  --dbuser postgres \
  --rum N \
  --uploads-dir /mount/uploads \
  --static-dir /mount/static \
  --listen-ip 0.0.0.0 \
  --listen-port 8080
# still in the `fly shell console`
psql -f /tmp/setup_db.psql $DATABASE_URL5. Configure the database 🗄
Add the ssl: false and socket_options: [:inet6] to the Pleroma.Repo section using vim. You’ll mainly need i to get to insert mode, arrow keys to navigate, and write/quitting vim by hitting the ESC key and then typing :wq.
# from the `fly shell console`
vim +27 /mount/config/config.exs
It should look like this before…
config :pleroma, Pleroma.Repo,
  adapter: Ecto.Adapters.Postgres,
  username: "postgres",
  # ...
… and this afterwards.
config :pleroma, Pleroma.Repo,
  adapter: Ecto.Adapters.Postgres,
  ssl: false,
  socket_options: [:inet6],
  username: "postgres",
  # ...
Once you’ve updated the config.exs file, run the database migration and exit the shell.
# still in the `fly shell console`
/opt/pleroma/bin/pleroma_ctl migrate
exit
Download and save your config.exs in a safe place.
flyctl ssh sftp get /mount/config/config.exs config.exs6. Launch the (empty) Pleroma instance! 🚀
Add START_PLEROMA to the environment variable of your fly.toml.
[env]
  # ...
  START_PLEROMA = "1"
Push up the changes and see the progress!
fly deploy
fly open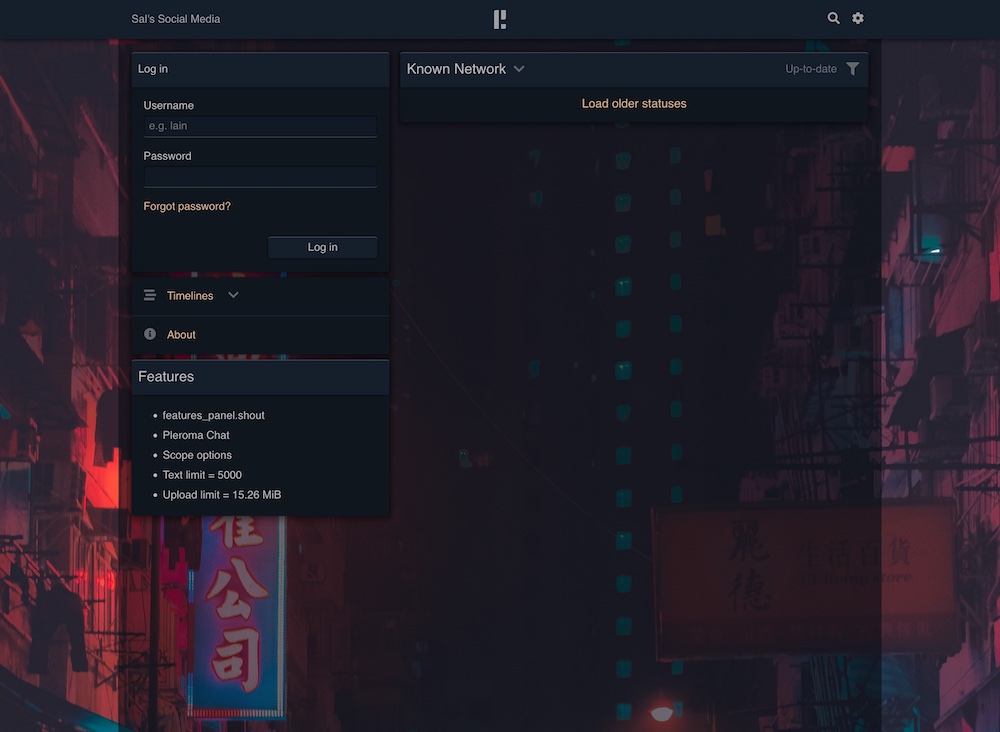
7. Add yourself and configure 🪞
ssh back into the app and add your account as an admin.
fly ssh console --command "su pleroma --shell /bin/bash"
# from the server
/opt/pleroma/bin/pleroma_ctl user new <username> <email-address> --admin
exit
You’ll get a reset password URL. If you’re setting up your own domain, and your certs have not been issued fly certs check <your domain>, then you might need to manually update the URL to use your Fly.io domain (your-app-1234.fly.dev) for now.
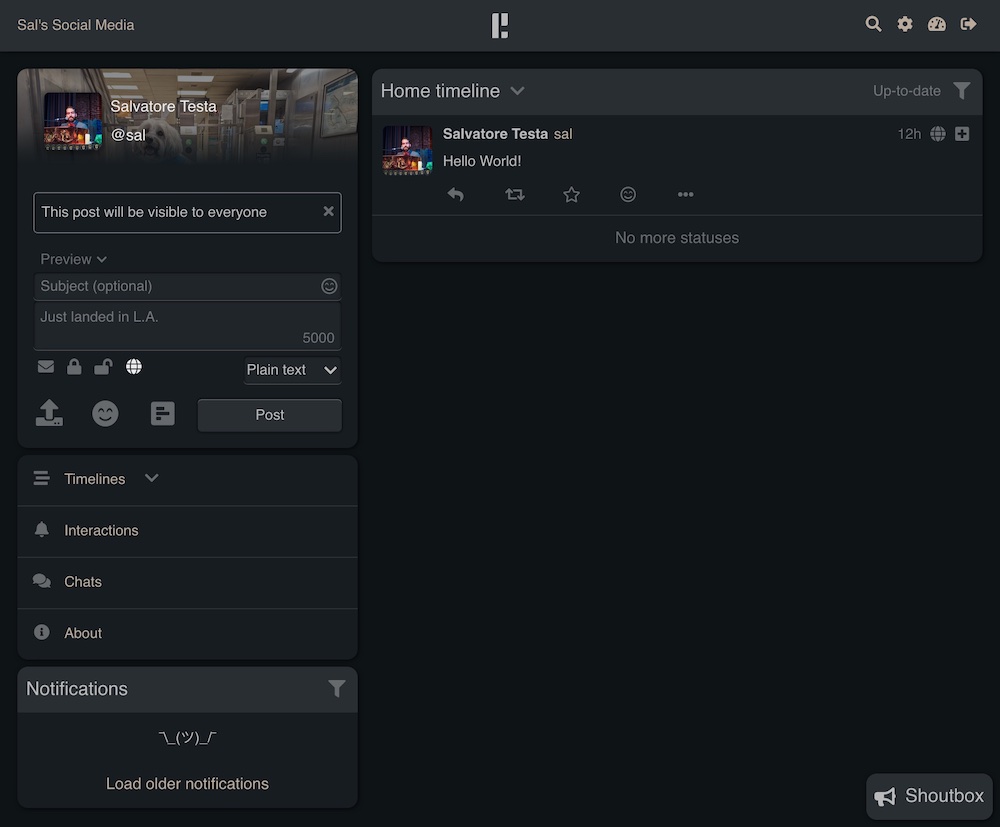
8. Celebrate! 🎉
You have a running Pleroma instance! Feel free to follow me by putting @[email protected] in the Pleroma search box.
You can also use Fedifinder to get your Twitter contacts and populate your feed.
Operating Notes
A lot of these are codified in the config.exs
- “Open registration” is on by default. I recommend turning it off first.
- Fly.io limits you to 1 volume per app. You can’t run the app in multiple regions because of the volume.
- The volume is mounted at
/mount.- static files are in
/mount/static. - uploads are in
/mount/uploads. - configs are in
/mount/config/config.exs.
- static files are in
Resources I found helpful
- Installing on Linux using OTP releases and all the other official documentation
- Stanislas Lange’s prior art on GitHub
- Fly.io community answer for setting up the database.
- One line bash server
- Bash text blocks in Docker on StackOverflow
Bonus
If you want more control over your Docker image, you can clone it and run fly launch from inside the folder.
Bonus Bonus
If you want to host Pleroma at subdomain.example.com but want to use [email protected], here’s the guide. If you get it to work, let me know.
Extra credit
There’s probably a way to use s3fs with Cloudflare’s R2 (that comes with 10GB free) instead of using a Fly.io volume. I tried but couldn’t get it working. If you get that to work, definitely let me know.